UITableViewDiffableDataSource for adding and removing rows automatically to a table view in Swift

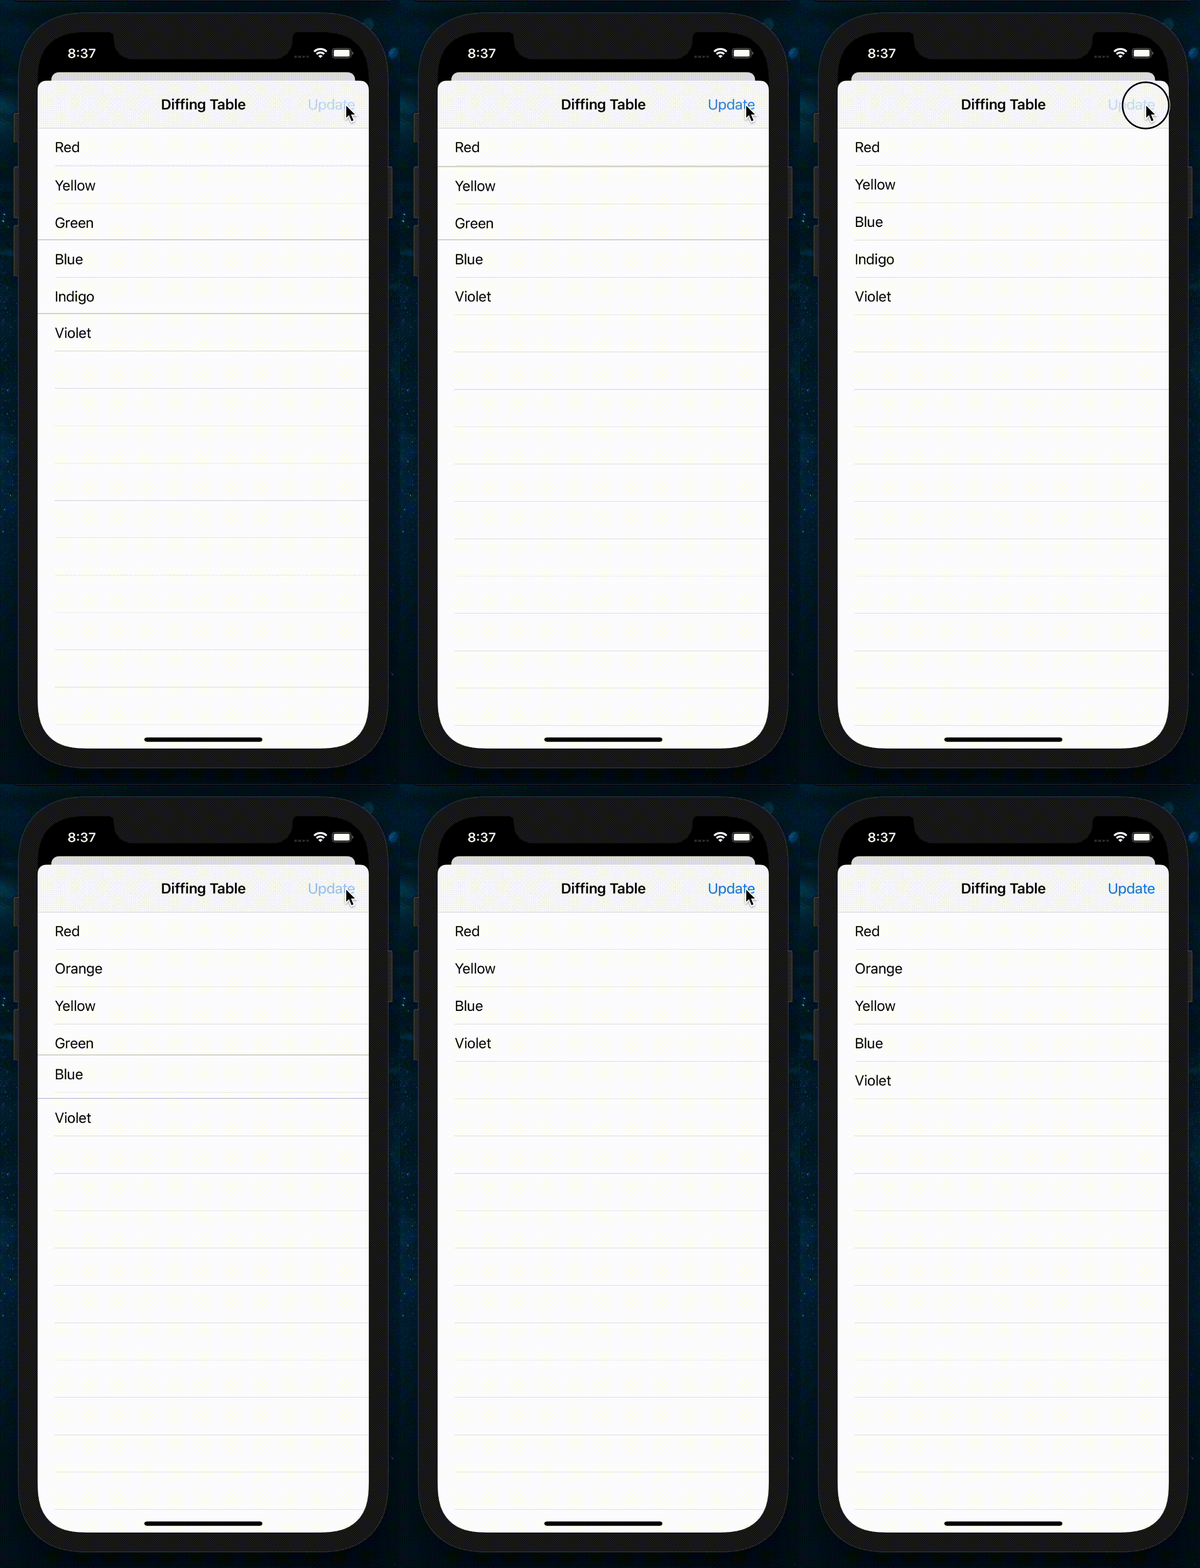
Over the years, I’ve had many situations where I need to dynamically add and remove cells from a table view, and there’s never been a great solution until UITableViewDiffableDataSource (besides maybe the Dwifft library, but the former is built-in). Here’s the effect we’re creating:

And here’s the simplest-but-still-useful example I could dream up. Unfortunately Apple’s docs for UITableViewDiffableDataSource aren’t very holistic, so I hope this proves useful to someone as a “batteries included” example.
Here is the gist:
- You have a normal UITableView.
- I like to make a func akin to the normal ‘cellForRowAt indexPath’ func, which is called to create the cells.
- Instead of your ViewController being the table’s data source, an instance of UITableViewDiffableDataSource is your data source. Its cellProvider is passed a closure that calls the above cell creator.
- You have an array of row viewmodels, and whenever it is updated, the table animates to match it by adding/removing rows for whichever have changed.
- I like to have a function called ‘buildMyRows’ that declaratively generates the rows, which I can call whenever something changes that would affect which rows are to be shown.
- Whenever the table is to be updated, a NSDiffableDataSourceSnapshot is created with the ids of all the rows. This is then passed to the dataSource, which then updates/removes rows to suit.
- This is brilliant for data entry tables where rows are added if someone selects a ‘yes I have a different mailing address to my billing address’ toggle, for instance.
And here’s the code:
class DiffTableViewController: UIViewController {

  let table = UITableView(frame: .zero, style: .plain)

  // The Int below is the type of the unique section ids, and String is for rows.
  var dataSource: UITableViewDiffableDataSource<Int, String>?

  // You might want to use an enum instead of struct for this, to neatly
  // support different row types; whatever works for you.
  struct MyRowViewModel {
      let id: String // These must be unique.
      let text: String
  }

  // Whenever this is set, the table automagically adds/removes rows to suit.
  var rows: [MyRowViewModel] = [] {
      didSet {
          if isViewLoaded {
              applySnapshot()
          }
      }
  }

  // The row update shouldn't animate during viewDidLoad; only animate
  // after coming on-screen.
  var shouldAnimateRowUpdates = false

  override func viewDidLoad() {
      super.viewDidLoad()

      title = "Diffing Table"

      // Demo button.
      navigationItem.rightBarButtonItem = UIBarButtonItem(
          title: "Update",
          style: .plain,
          target: self,
          action: #selector(demoUpdateRows))

      // Set up the table view normally.
      table.register(UITableViewCell.self, forCellReuseIdentifier: "id")
      table.translatesAutoresizingMaskIntoConstraints = false
      view.addSubview(table)
      table.leadingAnchor.constraint(equalTo:view.leadingAnchor).isActive = true
      table.trailingAnchor.constraint(equalTo: view.trailingAnchor).isActive = true
      table.topAnchor.constraint(equalTo: view.topAnchor).isActive = true
      table.bottomAnchor.constraint(equalTo: view.bottomAnchor).isActive = true

      // Instead of the VC being the data source, make a
      // UITableViewDiffableDataSource as the data source.
      // You can subclass UITableViewDiffableDataSource.
      dataSource = UITableViewDiffableDataSource<Int, String>(
          tableView: table,
          cellProvider: { [weak self] in
              self?.cell(for: $0, indexPath: $1, id: $2) ?? UITableViewCell()
          })
      dataSource?.defaultRowAnimation = .top // I think top looks best.
      table.dataSource = dataSource

      // Load the initial rows.
      rows = buildMyRows()
      shouldAnimateRowUpdates = true
  }

  // Just for a demo, update the rows.
  @objc func demoUpdateRows() {
    rows = buildMyRows()
  }

  // This updates the rows in the table by animating in/out added/removed rows.
  func applySnapshot() {
    // Make a 'snapshot' of the ids of the rows we want displayed in the table.
    var snapshot = NSDiffableDataSourceSnapshot<Int, String>()
    snapshot.appendSections([0])
    snapshot.appendItems(rows.map { $0.id })

    // Insert/remove the rows by diffing the ids vs what they were last snapshot.
    dataSource?.apply(snapshot, animatingDifferences: shouldAnimateRowUpdates,
                      completion: nil)
  }

  // Declaratively define which rows we want displayed.
  // These row viewmodels should be lightweight, maybe just an ID and a reference
  // to the real model in each.
  func buildMyRows() -> [MyRowViewModel] {
    var rows: [MyRowViewModel] = []
    rows.append(MyRowViewModel(id: "r", text: "Red"))
    // Randomise some rows for the demo's sake.
    if arc4random() % 2 == 0 {
        rows.append(MyRowViewModel(id: "o", text: "Orange"))
    }
    rows.append(MyRowViewModel(id: "y", text: "Yellow"))
    if arc4random() % 2 == 0 {
        rows.append(MyRowViewModel(id: "g", text: "Green"))
    }
    rows.append(MyRowViewModel(id: "b", text: "Blue"))
    if arc4random() % 2 == 0 {
        rows.append(MyRowViewModel(id: "i", text: "Indigo"))
    }
    rows.append(MyRowViewModel(id: "v", text: "Violet"))
    return rows
  }

  // Create a cell for the diffing data source.
  func cell(for tableView: UITableView, indexPath: IndexPath,
    id: String) -> UITableViewCell {
      // It appears idiomatic that we are to use the id instead
      // of the index path to find the row.
      let row = self.rows.first(where: { $0.id == id })

      // Create the cell as you'd usually do.
      let cell = tableView.dequeueReusableCell(withIdentifier: "id", for: indexPath)
      cell.textLabel?.text = row?.text
      return cell
  }

}
Thanks for reading, I hope it was helpful, God bless :)
Photo by Andrei Razvan on Unsplash
Thanks for reading! And if you want to get in touch, I'd love to hear from you: chris.hulbert at gmail.

Chris Hulbert
(Comp Sci, Hons - UTS)
Software Developer (Freelancer / Contractor) in Australia.
I have worked at places such as Google, Cochlear, Assembly Payments, News Corp, Fox Sports, NineMSN, FetchTV, Coles, Woolworths, Trust Bank, and Westpac, among others. If you're looking for help developing an iOS app, drop me a line!
Get in touch:
[email protected]
github.com/chrishulbert
linkedin